When I decided to try my hand at reupholstering a set of antique chairs, I feared that it would be way more trouble than it was worth, but I was willing to try, hoping that after I invested the initial time to learn the process, it would result in some fun, future projects.
I set to work watching YOUTUBE videos, googling step-by-step instructions and picking the brain of an expert friend who had done quite a few pieces. In the end, it wasn’t easy, but the tips saved me a ton of frustration and the end result was really rewarding. If you are thinking of reupholstering a piece, here are the steps and tips that helped make my experience relatively painless.
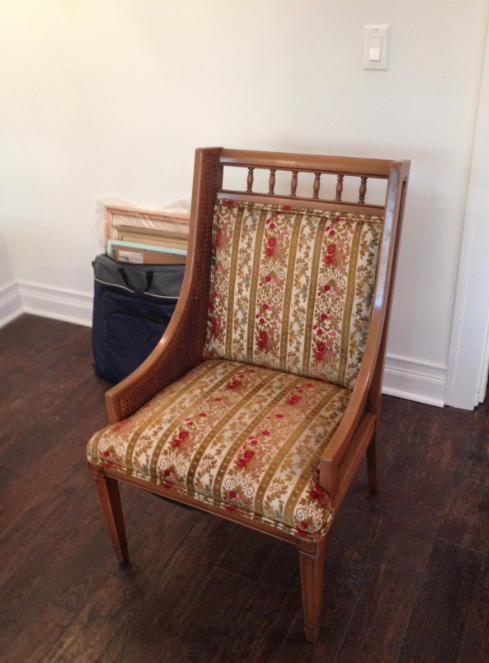
1. Buy cheap – Antique chairs are on trend and many resellers have adjusted their prices accordingly. In many cases, this means that it might not even be cost-effective to reupholster an old piece. I purchased these chairs for $40 each. They were in great condition despite their age and their shape was really unique. They were also really comfortable. Your costs can get a bit out of hand if you have to fix the chair frame, cannot reuse the foam/padding or have to refinish the wood.
Where to shop:
My two favorite Chicago spots are Brownstone and Mercantile M, where I purchased these chairs. Both places offer very fair prices and great delivery rates if you are buying bigger pieces.
Craigslist, Goodwill, Salvation Army and Estatesales.net are also gold mines, but you usually have to arrange your own delivery.
2. Get a quote from a professional reupholster or two – I was quoted $250 per chair plus the cost of the fabric, so I determined that it was worth it for me to try to do it myself.
3. Make sure you have the right tools – I borrowed a staple gun and a compressor from a contractor friend after I was told that a manual staple gun wouldn’t produce ideal results, not to mention the fact that it would be hard on my hands. You might be able to rent these items from Home Depot. I was told that you can buy a great staple gun for $100 and add a battery that gives you a power boost that is not as strong as a compressor, but is much better than a manual staple gun for another $100. Probably worth the investment if you like DIY projects.
Tool summary:
– Staple gun with a compressor or battery pack and staples
– Pliers (to remove old staples, or in my case about 200 nails), there are also other tools that will make this step even easier.
– A butter knife – Key for prying the fabric and trim away from the chair without cutting yourself on a staple or nail in the process.
– Face mask – Old chairs can be dusty during disassembly
– Fabric glue – I didn’t end up using any, but it is often necessary (or an easier solution) for trim
– Nails and a hammer – For use in the areas where the staples can’t achieve a secure enough hold. I only used one nail.
– Fabric shears or really sharp scissors. No need to buy the $30 sheers, but an upgrade to a $5 new pair will make your life easier.
– A rug, blanket or tarp to protect your floor
– Fabric and trim– more on this later
4. Choose the right fabric, buy extra and use a coupon – I would highly recommend using upholstery fabric as it is rated to stand up to extra wear and tear. I purchased this blue velvet hexagon fabric from the Joanne Fabrics website (which has a better selection than the stores). It was originally very expensive, but here’s a tip that will save you tons of money – Joann Fabrics has great coupons and if you get a coupon for 50% off one item (which they always seem to have), it’s actually 50% off your entire order of that individual fabric even though it’s sold by the yard. Google Joann Fabric coupons, download their app or simply go to the website where they often post coupons. I was told that I would need 3 yards of fabric per chair, but I actually used quite a bit less (see tips on how to maximize your fabric below).
5. If your chair needs any repairs, do it now. Also, if you want to paint, polish or lacquer the wood, it is much easier to do it now as well so you don’t have to worry about protecting the fabric.
Now you are ready to reupholster your chair!
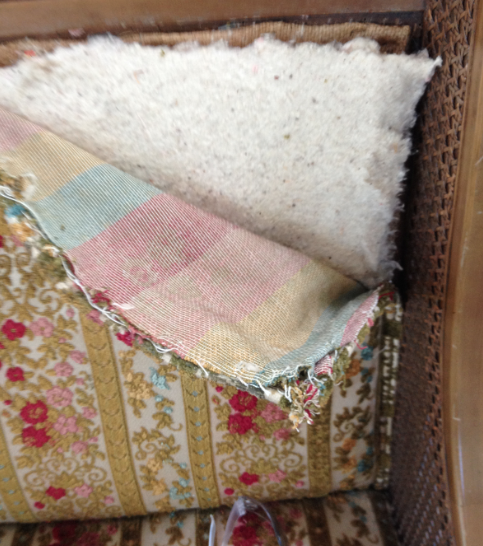
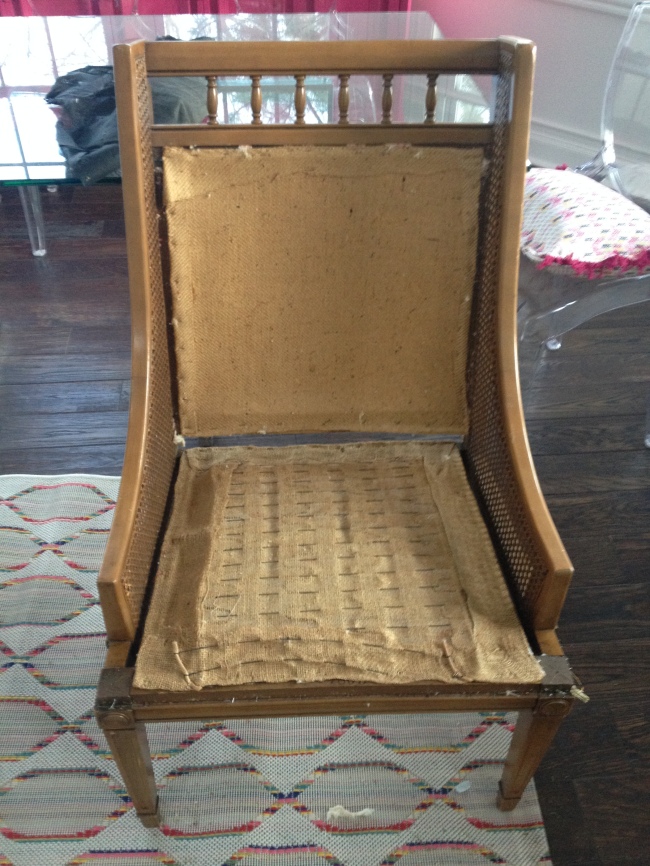
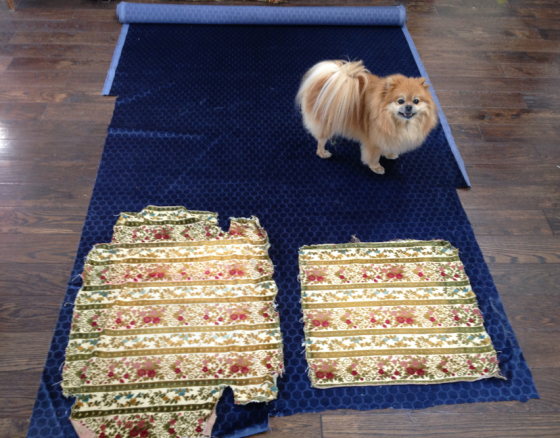
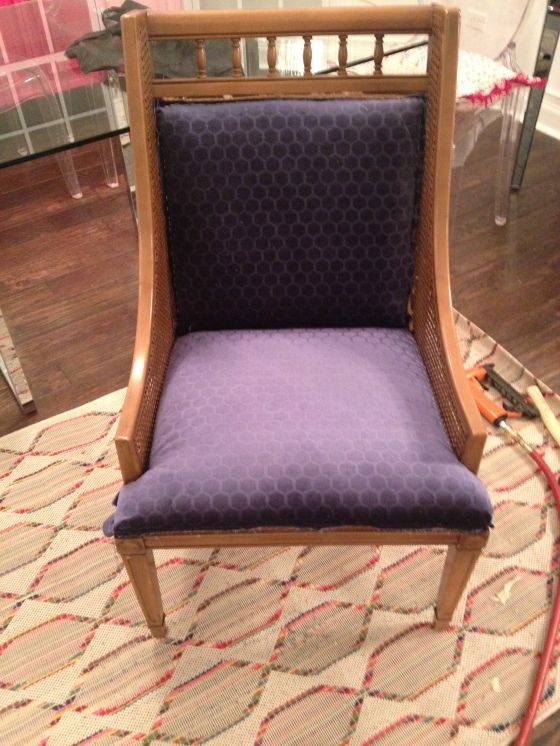
Step 1, Disassembly: Take apart the chair, paying careful attention to how the chair was constructed so you can replicate the process. If the seat cushion is removable the process will be much easier (this wasn’t the case for the chairs I chose, of course). Remove all nails and staples that were used to secure the fabric carefully as you might want to reuse the trim (I wrapped the old trim chord in my new fabric to save lots of time). Set aside the foam, fabric and trim, keeping each section together and label them if you have a very complex chair. See a pic of my “naked” chair frame below. There is often a correct order for reupholstering. For example, for my chairs, I need to start with the seat cushion, followed by the front side of the chair back and then the backside of the chair back because the fabric had to be pulled through the back gap of the chair where the seat cushion met the chair back and stapled on top of one and other from the back. Make sure you are on the look out for this as you are disassembling a chair.
 Step 2, Cutting the fabric: Once you have taken the chair apart completely, lay the old fabric on top of your new fabric, using it as a pattern. In order to save on fabric, arrange the pieces in a way that allows you to waste as little fabric as possible. Cut your new fabric an inch or so wider than the old fabric so you have a bit more to work with (this is true for all areas EXCEPT the corners, you don’t want to have too much excess fabric here. Everywhere else you can easily trim off the excess fabric once the staples are in place and it will be easier to staple the fabric (and safer for your fingers!) if you have a little excess fabric to grasp.)
Step 3, Stapling: Start stapling in the middle of each section and pull the fabric taunt, but not too taunt. If you pull it too tight, your chair could look lumpy or the fabric could look misaligned, conversely, if you don’t put it tight enough you will see fabric bunches and it won’t look professional. Do a couple of staples at a time and then check your alignment to make sure the fabric remains straight. This is what the chair looked like before the trim.
Step 4, Adding the trim: You can often buy trim at a fabric store, which is definitely the easier way to go. If you can’t find a trim that matches or provides the look you want, the next best solution is to use the same fabric to make the trim. In this case, I wrapped the old double-cord trim in my new fabric, stapling it in the middle so you can’t see the staples. The hard part was making sure that the middle staples went through the ends of both sides of the fabric in the back as well.
Step 5, add embellishments: The final optional step is to add some extra embellishments to jazz things up. I chose removable Peacock feathers (purchased at Michael’s) for a touch of playful opulence and color. They are just taped to the back of the chair in this case. You could also add fringe to the bottom of the chair or a cute pillow (stay tuned for my post on DIY no sewing required pillows).
 It took me about 4 hours to do my first chair from start to finish, mainly due to the learning curve and the fact that the previous upholster used a ton of nails, which proved to be very difficult to remove. I also took lots of stretching breaks as it was quite hard on the back. I figure I will be able to do the second chair in less than three hours. The total cost, including the purchase price for the chair, came in at $100/chair. Not bad for a unique, comfortable chair and bragging rights :)
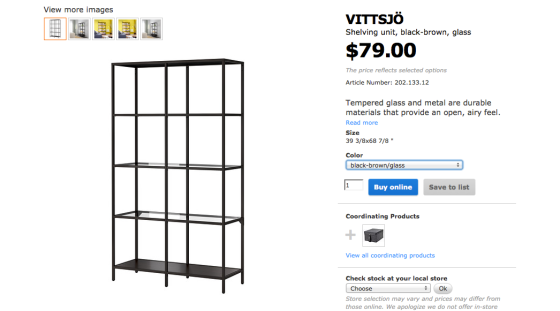
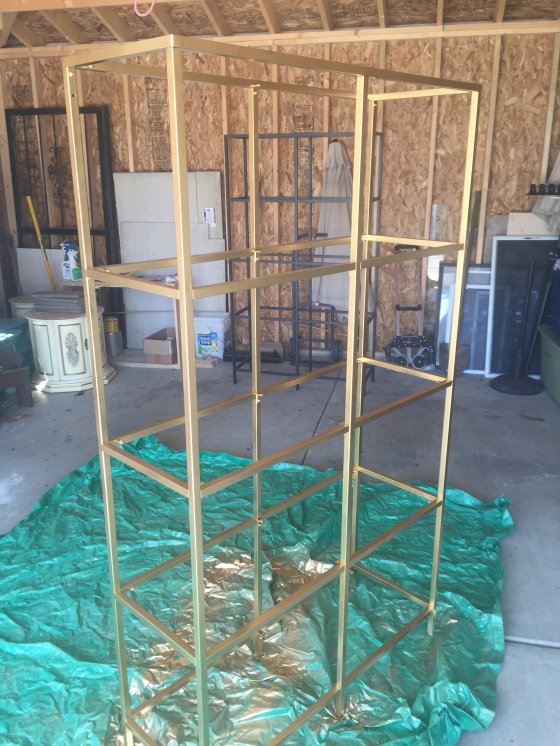
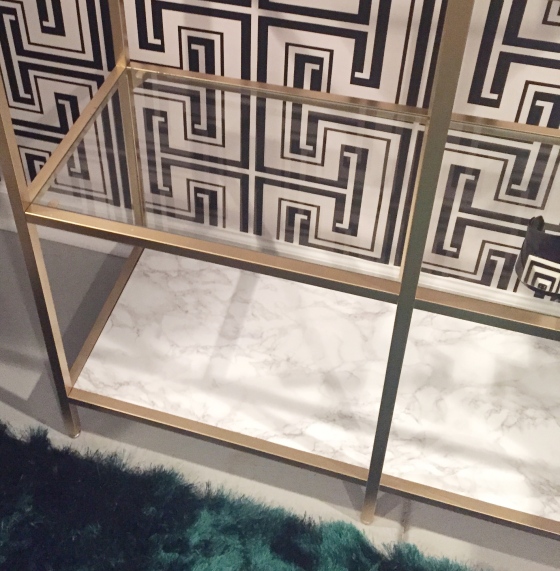
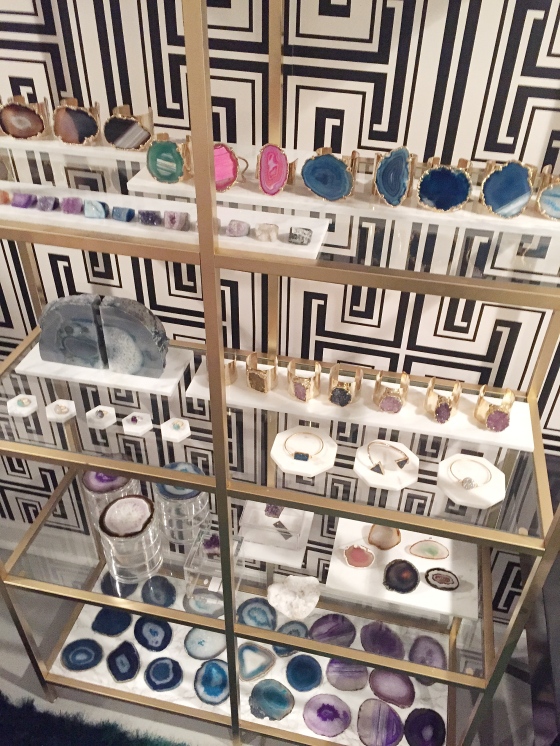
 Some things are just better together. I feel this way about gold and marble. I can’t seem to get enough of this luxurious pairing, but the cost (not to mention the weight!) can add up quickly, so I made it my mission to find a way to create the look for less.